Distance Data
This page explains how the Distance page works in the application. The purpose of this page is to help the user inspect and adapt the distance and the duration data obtained from the external service. More specifically, you need to set the attribute Retrieve Distance in the sheet Transport Cost Data in order to indicate for which lanes you want to generate the distance and the duration data.
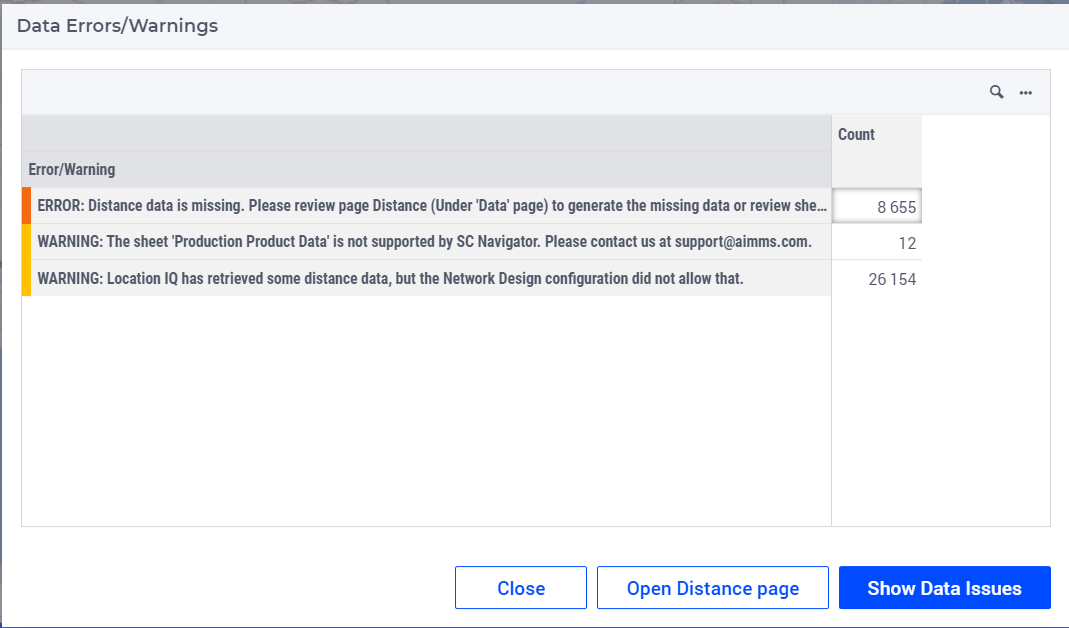
This page is not visible in the workflow by default. After loading the input data, the Data Errors/Warnings dialog page shows up and you can select the Open Distance Data option to navigate to that page, if the input data contains a lane which has the Retrieve Distance attribute set active.
At this stage the Distance button becomes visible in the workflow.

If you navigate to the Distance Data page, a table shows for which lanes should the distance and the duration be calculated.
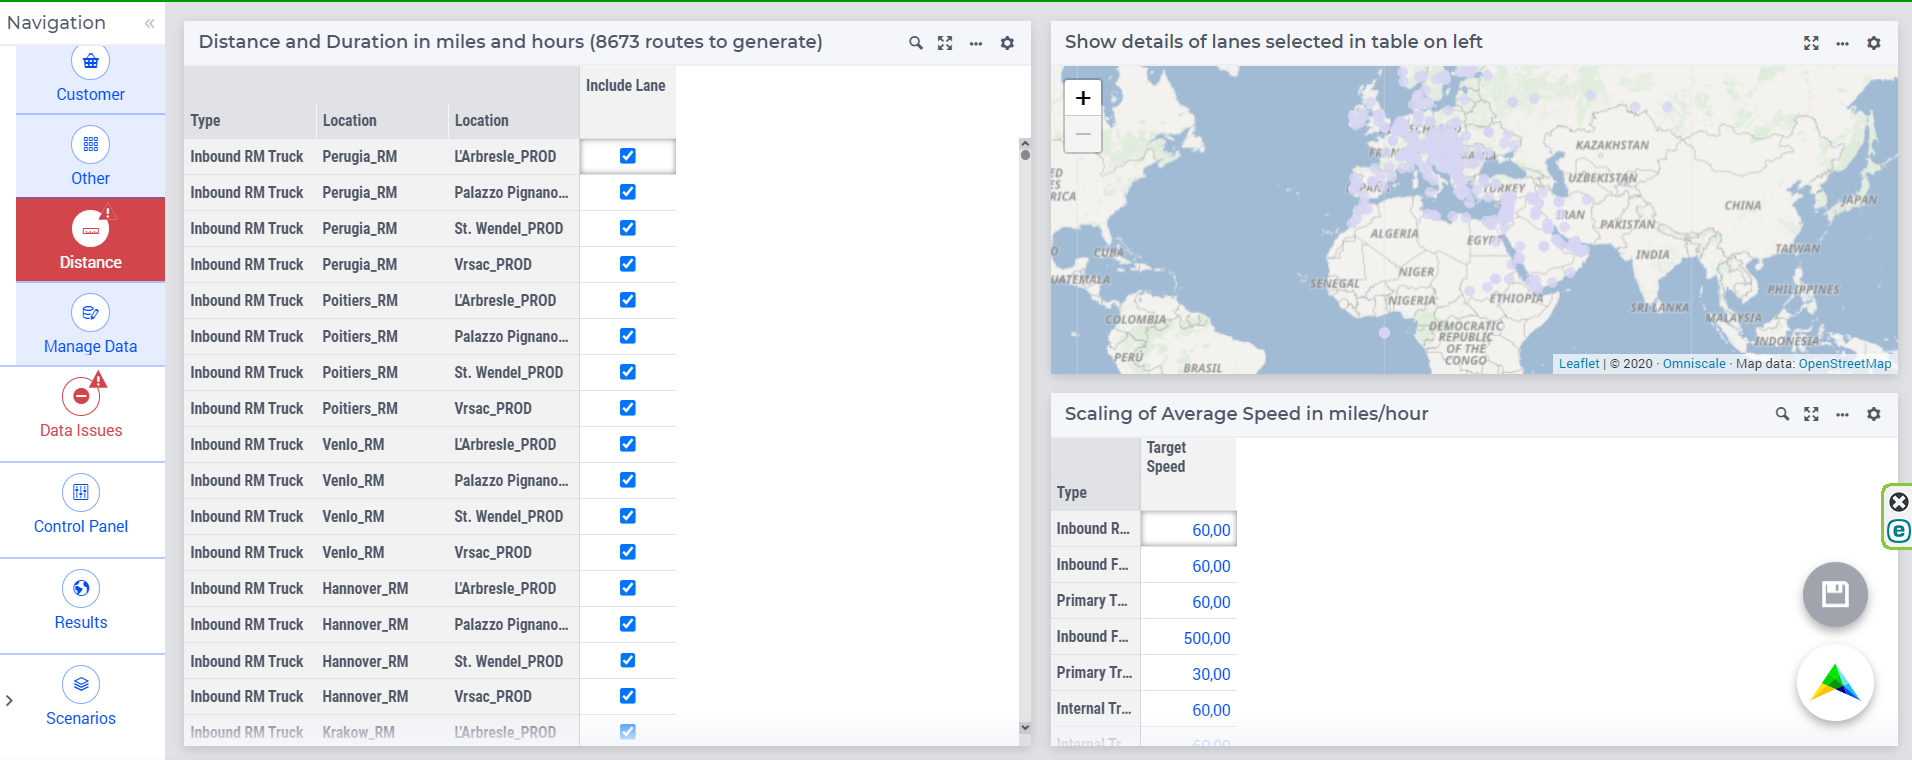
The data is retrieved once you click on the page action Retrieve Distance and Duration for lanes.
You can calculate the distance and the duration data by clicking on the  icon.
icon.
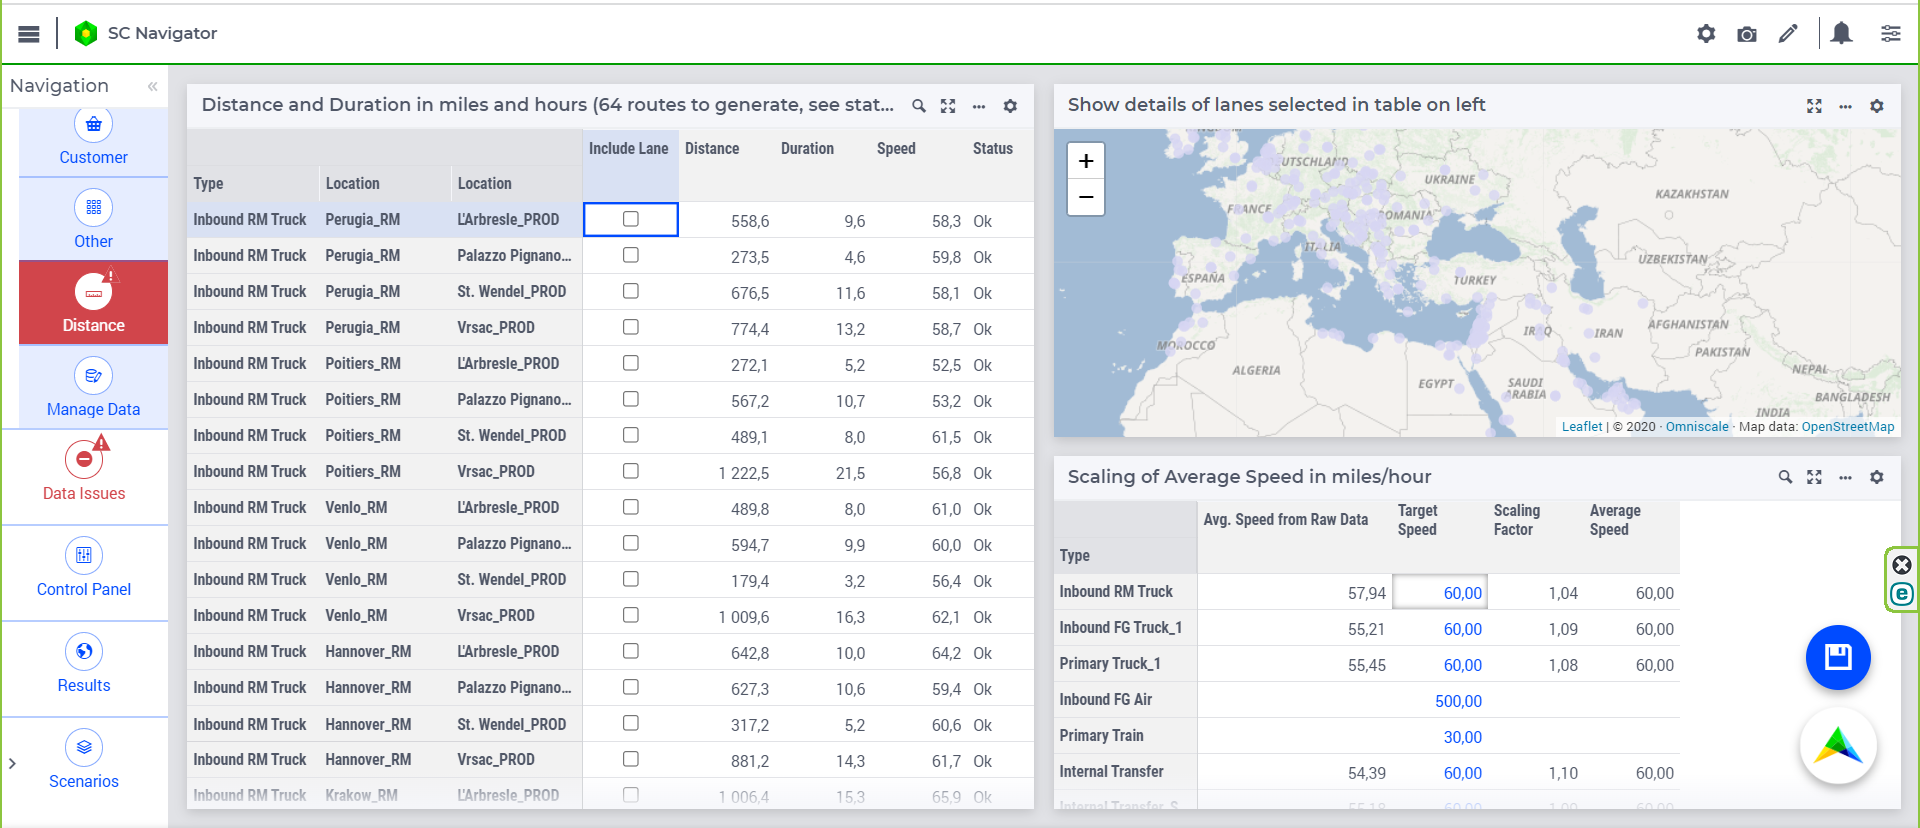
After the calculation the tables on the page show the details about speed, distance, and duration:
Once you have inspected the results, you need to save them via the Save Distance/Duration Data page action menu. This saves the data so that it can be retrieved the next time you are loading this Excel file.
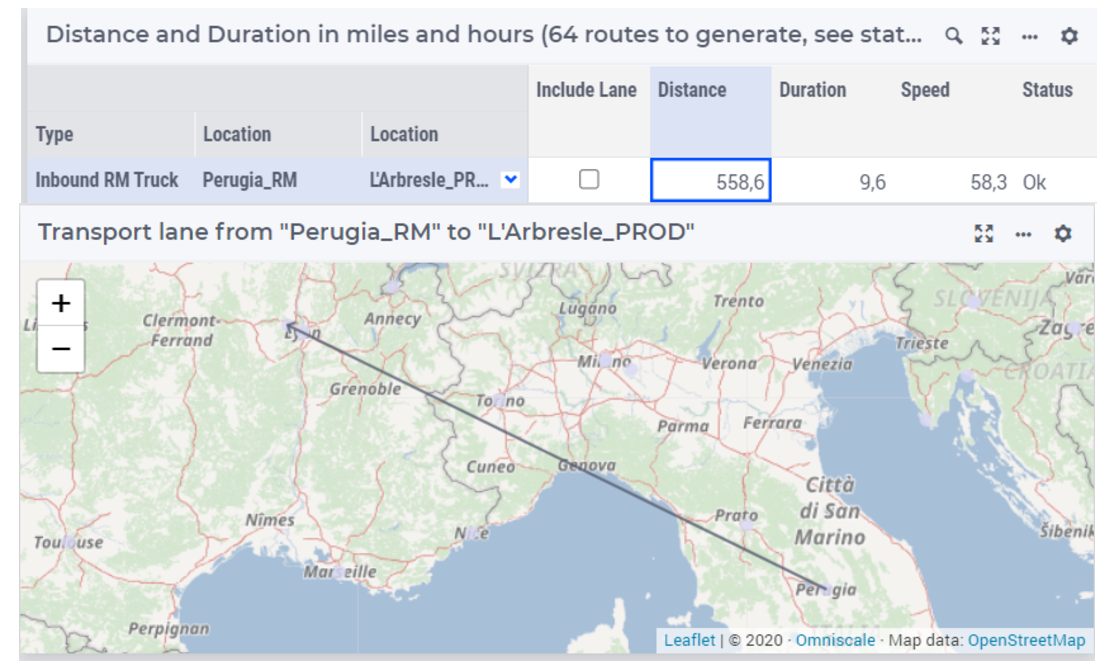
Distance and Duration Table
This table shows the details for the different lanes.
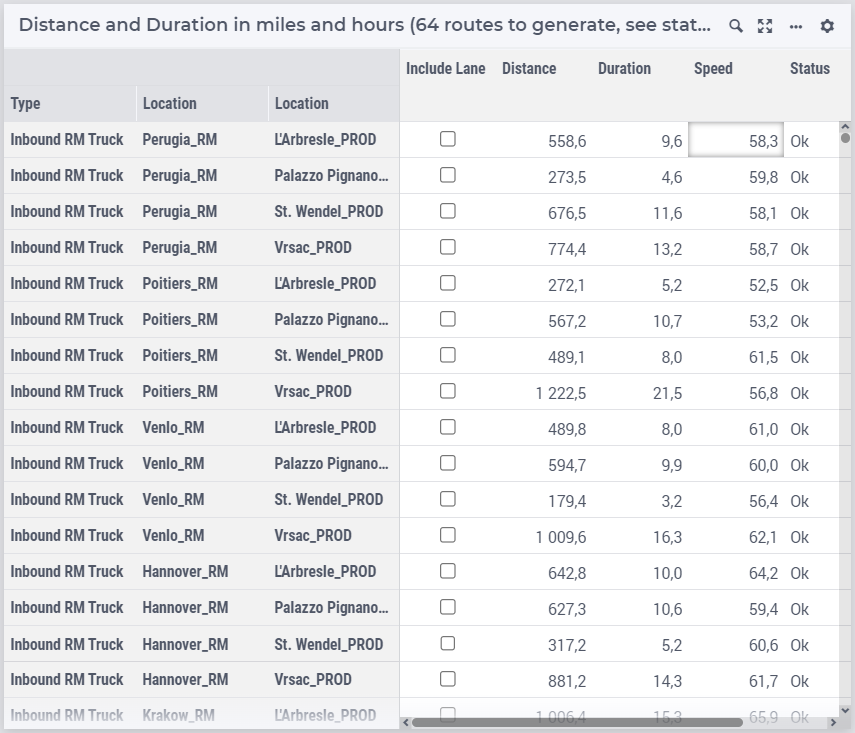
Distance: the distance in miles or km, depending on the setting of the wizard (the actual unit is also mentioned in the table header)
Duration: the duration in hours, which is scaled based on the Average Speed, see below
Speed: the speed calculated as Distance divided by Duration
Status: possible statuses are the following:
No coordinates for Origin/Destination: either the origin or the destination is not geo-coded
OK: the distance, the duration, and the speed data are calculated for the lane
Unable to calculate: there is no route between the two locations (for example, you may get this error when you try to calculate the distance between Europe and the USA)
There are daily limits for calls to Location IQ on your account. If you get this message, save the results which you already have and try the rest at a later moment.
Transport Lane Map
This Map shows the connection between the origin and the destination as a straight line for a selected lane. You can select lane from the Distance and Duration table by clicking one of its columns.
Scaling of Average Speed Table
This table shows the speed data for each mode of transport, such as:
Average Speed from Raw Data
Target Speed
Scaling Factor
Average Speed
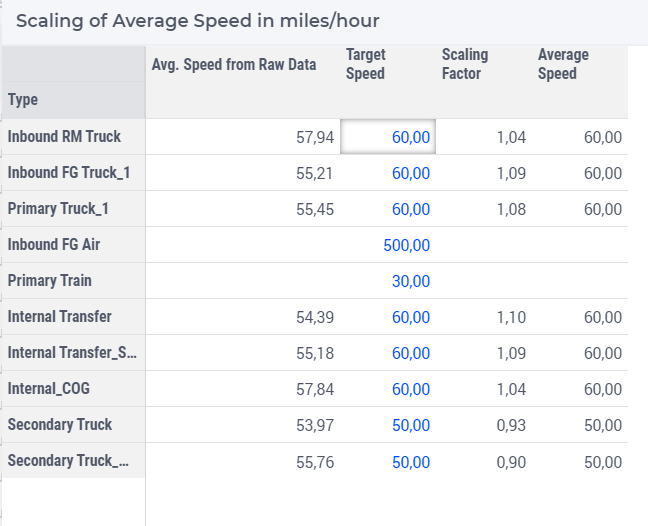
The geocoding service provides both distance and duration data. The distance data can be used directly as there are very few choices/assumptions made to get these data (once you have chosen the route, the distance is determined).
However, there are many choices/assumptions with respect to the duration. What vehicle is used? Do you drive below, at, or above the speed limit? How busy are the roads? All these questions influence the duration. In the table on the right you can see this average speed as Avg. Speed from Raw Data. Yet, this might be too low or too high compared to the speed of your fleet (by mode of transport). Therefore, if you provide Target Speed, SC Navigator and the applications will scale the durations such that the average speed of all these lanes matches the Target Speed.
Important
If you change the Target Speed in the user interface, then this will be saved as part of the dataset. However, you might also want to change that value in the column “Speed” of the “Mode of Transport” sheet, as this becomes the default target speed, so that you do not have to change that the next time you load this from Excel.
Saving the Data
After the calculation you should save the Distance and Duration data. You can save the data by clicking on the page action icon  .
.
Important
As mentioned before, it is important to click the Save Distance/Duration Data page action so that these data are stored. Only after doing so, the page will be marked as completed in the application workflow.