Warehouse Scenario
Note
Scenario Navigator Overview section in How to Use the Application introduces the purpose and benefits of scenario functionality.
Structure Overview section details the hierarchy from individual Scenarios to Network Scenarios and Batch Runs.
Scenario Pages Layout section describes the shared functionality that is common across all types of scenarios.
On this page, you can create Scenarios for the warehouse input data. A Warehouse Scenario is an adjustment of the data of an Attribute in one of the Warehouse data tables. There are two different types of Warehouse Scenarios: Warehouse and Warehouse Product. In the Data Tabs area, there are two tabs corresponding to the types of Warehouse Scenario. All the data on the page is based on the type of Scenario corresponding to the selected tab:
Warehouse Data Tab displays data in Warehouse, Location, Step, Period
Warehouse Product Data Tab displays data in Warehouse, Location, Product, Step, Period
Examples
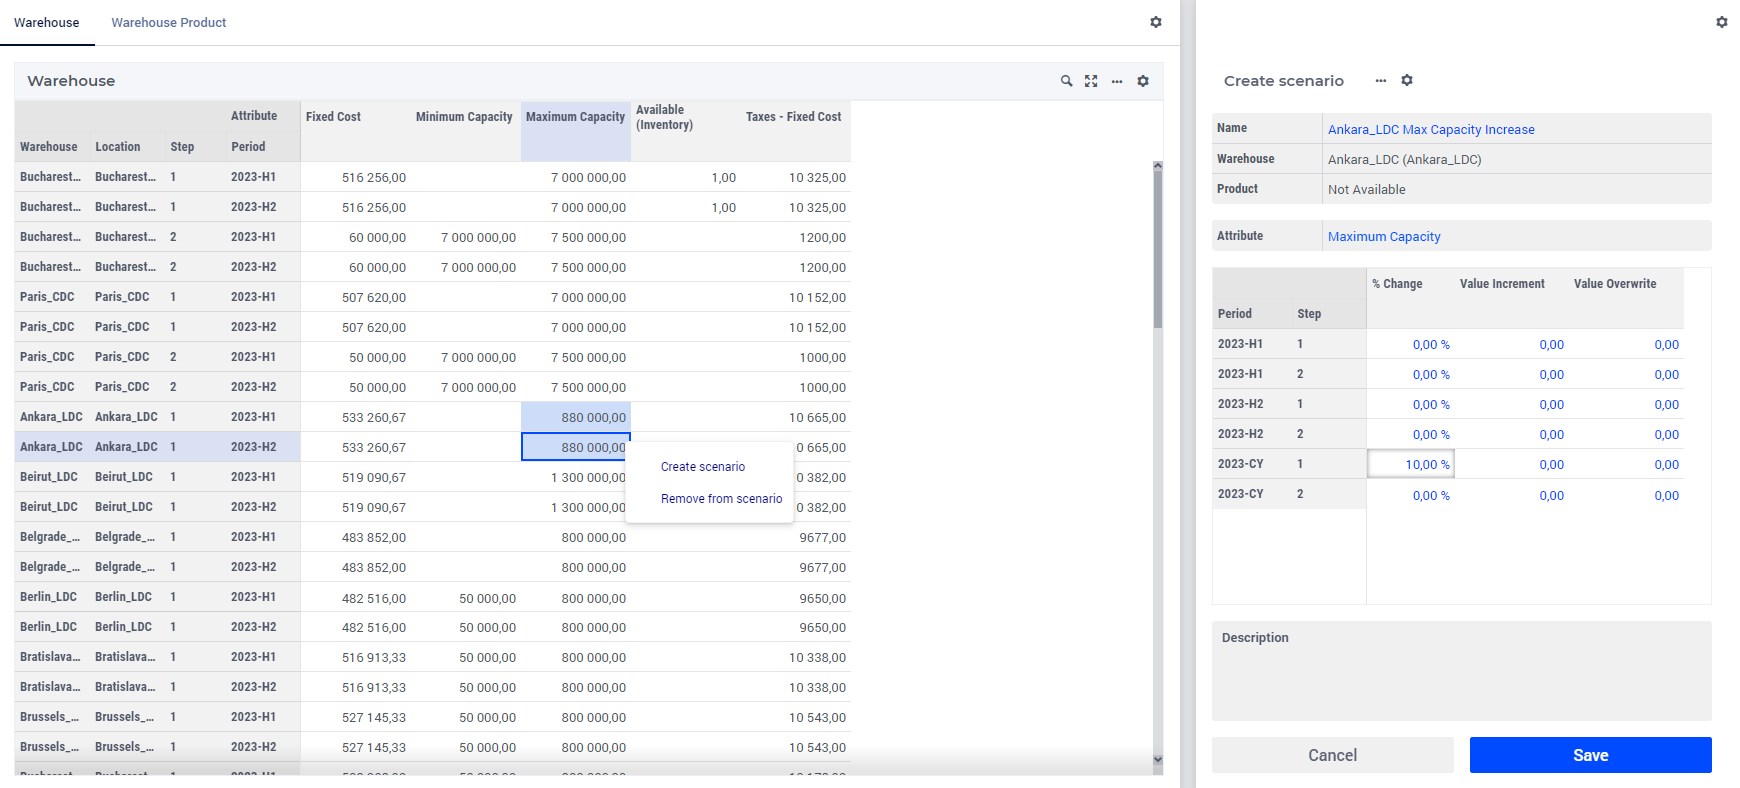
Scenario 1: One Warehouse has increased its ‘Maximum Capacity’ by 10% in all locations and all periods for step 1.
Warehouse ‘Ankara_LDC’ has increased its capacity in all locations and all periods.Select Warehouse to be ‘Ankara_LDC’. For Location, choose ‘Ankara_LDC’ as well.
Select the ‘Maximum Capacity’ Attribute from the drop-down list.
In the table underneath, enter the value 10 in the cell at the intersection of the column ‘% Change’ and the row for the period group ‘2023-CY’ and step ‘1’.
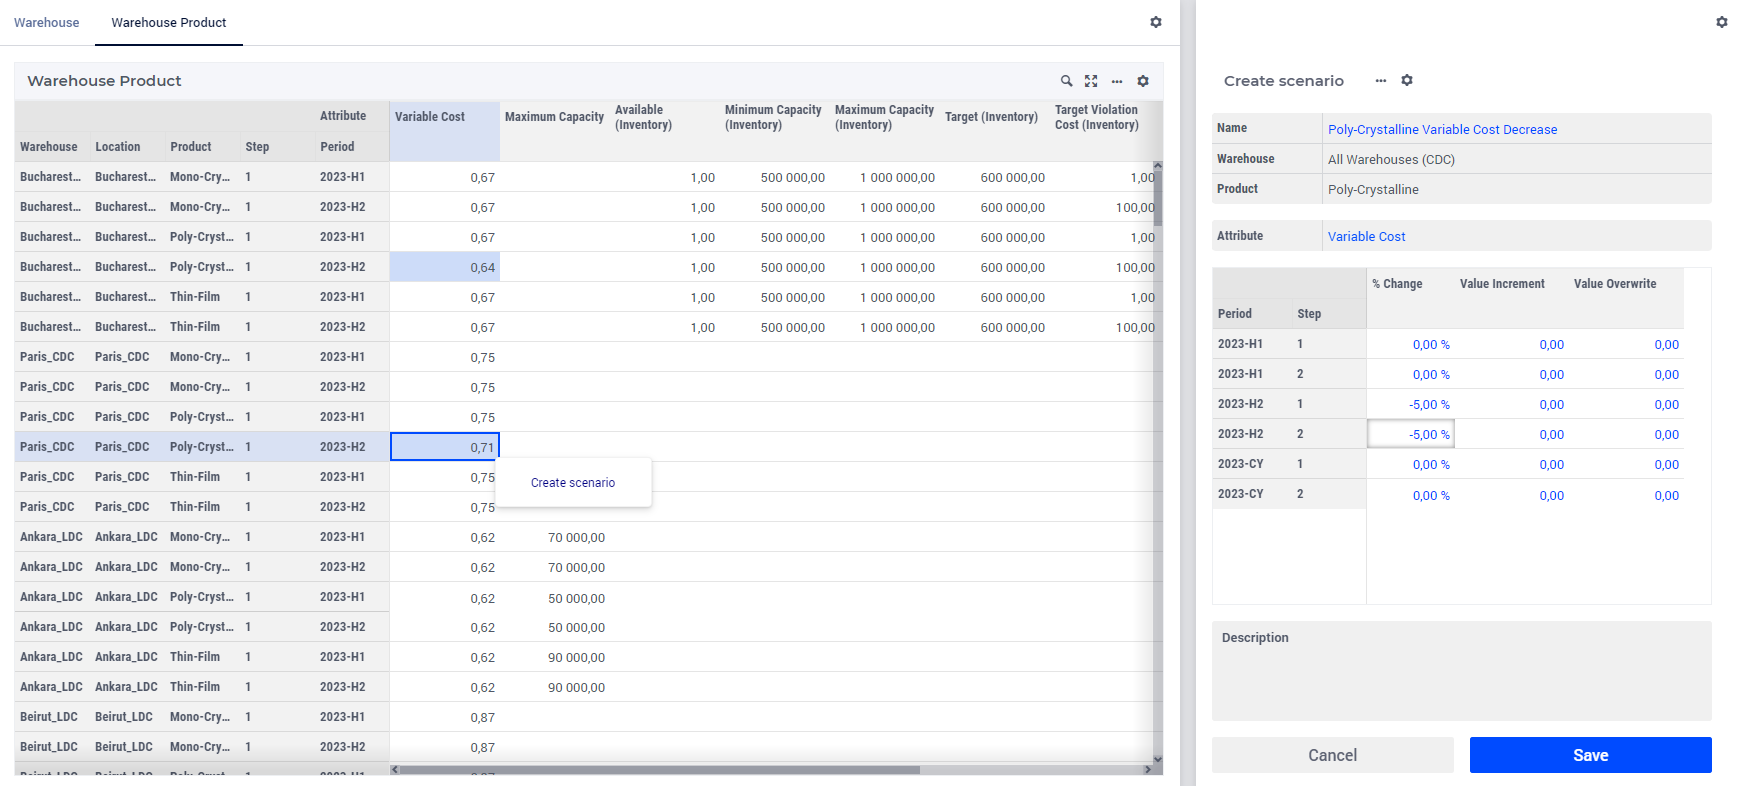
Scenario 2: The Warehouses in a group of locations decrease cost.
All central distribution centers (CDC) have reduced by 5% ‘Variable Cost’ for ‘Poly-Crystalline’ in ‘2023-H2’.Select Location to be the group ‘CDC’ (by default, all Warehouses will be selected, there is no need to select any).
Select Product to be ‘Poly-Crystalline’.
Select the ‘Variable Cost’ Attribute from the drop-down list.
In the table underneath, enter the value -5 in the cell at the intersection of the column ‘% Change’ and the rows for the period ‘2023-H2’ and steps ‘1’ and ‘2’.